How to use AirDrop on your iPad?

When you want to transfer a file from your iPad to a Mac, you can simply use the embedded AirDrop feature to seamlessly move any of your file to any Mac for which you have AirDrop rights.

This requires both the iPad to run iOS 8 and the Mac to run OS X 10.10 (Yosemite).

Simply follow these steps:

  • First, ensure that you enabled AirDrop; if not, activate it (you need both WiFi and Bluetooth)
  • Open BudgetInMind on your iPad. If a file is opened, simply close it to return to the File Manager
  • Press the Share button in the toolbar and press “Send a Copy”
  • Select the file you wish to transfer
  • If you want to transfer a file by Email, press the Zipped File image, otherwise, select the Standard format
  • Wait for AirDrop to find your Computer then press the icon of the destination computer
  • That’s it. The file is uploaded to your Mac where you’ll have a choice to directly open it or it will be saved in your Download folder for later use

To Send a file from your Mac to your iPad, simply do the reverse. You can directly drop any BudgetInMind file in your iPad icon on your AirDrop folder, or use the share Button embedded within BudgetInMind for Mac.
An alert box will popup asking you to accept the incoming file.

If the file already exists, we will rename it to prevent erasing your existing files.

Release of BudgetInMind 1.0.8 for Mac

This update adds the following series of features and improvements:

  • Adding the sharing button to share files using AirDrop.
  • Enhances the user interface to prevent rare cases where the content view would not immediately update after a change of User, Year or Currency.
  • Corrected a minor issue that prevented the use of the “comma” as the decimal separator in the trading section of the book entry view.

In case of issues or questions, please contact us at support@softurion.com or visit our enhanced support site at http://www.softurion.com/support/en/

Release of BudgetInMind 1.0.7 for Mac

This update adds the following series of features and improvements:

  • Adding a new bank CSV import view to directly import bank files into BudgetInMind.
  • Adding Drag & Drop capability from any view to external applications such as Numbers, Excel, Word, …
  • Adding Verification level filter to the toolbar to quickly see what is verified.
  • Adding automatic saving of user graph preference in the account view.

In case of issues or questions, please contact us at support@softurion.com or visit our enhanced support site at http://www.softurion.com/support/en/

Managing Stock Split

Managing Stock Split

With the recent Apple 7:1 stock split, you may wonder how you can manage this event within BudgetInMind.

This operation is in fact straightforward: If you hold V stock with an average cost of c and with a current market value of p, then a N:1 stock split will simply transforms these variables into V.N, c/N and p/N.

Yahoo finance API stores historical quotes on their servers, so even if the stock splits in a given day, the market closing price of the previous day remains the value before the split.

To take this into account in BudgetInMind and continue using the automatic download features, we simply need to mimic what occurred in real life:

For every 1 stock you hold, you will receive N news stocks

This translates into:

  • For each position with the given stock, sell all your quantities at pre-split cost.
  • For each position with the given stock, buy N times your pre-split quantity at 1/Nth of the cost.

The following files contain database examples before and after the stock split:

FilenameLanguageDownload
Pre_StockSplit.dbim.zipEnglish
Post_StockSplit.dbim.zipEnglish

BudgetInMind Trading now features “T-Column” views

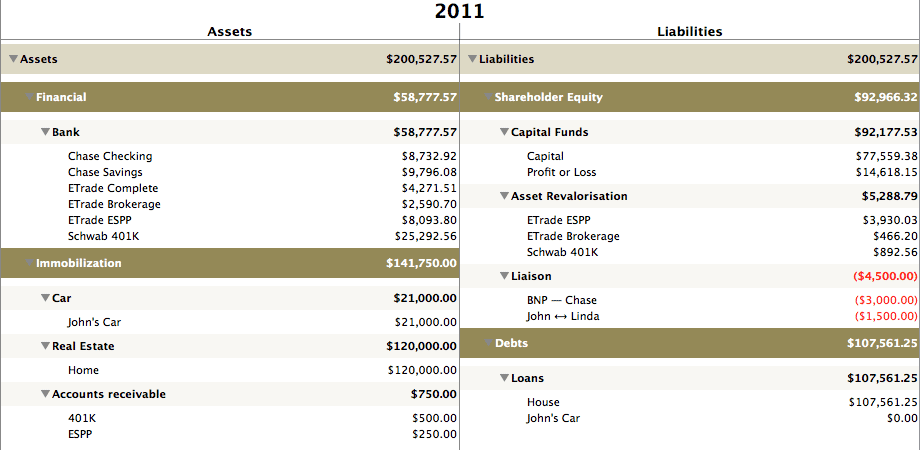
BudgetInMind 1.0.6 for Mac adds a new way to see your Balance Sheet and Income Statement, with the  “T-Column” view, famous in the finance community. The view features 2 columns side by side, allowing you to see the 2 larges masses of your data, being the Assets and Liabilities for the Balance Sheet or the Expenses and Income in the Income Statement:

T-Column View

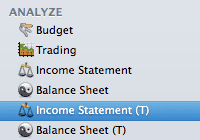
To select this new view, simply click onT-Column Access

  • Income Statement (T)
  • Balance Sheet (T)


Release of BudgetInMind 1.0.6 for Mac

This update adds a series of features and improvements, and addresses overall stability and performance, including:

  • Adding a second finance API to download historical stock quotes in case the default API does not report stocks in a given geography (For instance to access JSE stock exchange).
  • Adding a new view to present Balance Sheet & Income Statement in 2 columns mode.
  • Adding the option to lock a book entry, preventing it from being erased or tampered with when the verification level is set to “Bank Statement”.
  • Adding the option to select the default year to open (between the latest one and the current year).
  • Application will reopen in full screen mode if it was closed while in full screen.
  • Fixed minor issues in the printing module, and user controller module.
  • Adds single user password management in BudgetInMind Lite.

In case of issues or questions, please contact us at support@softurion.com or visit our enhanced support site at http://www.softurion.com/support/en/

To get more information on BudgetInMind for Mac, simply follow this link.

Release of BudgetInMind 1.0.1 for iPad

This update adds a series of features and improvements, including:

  • Adding a second finance API to download historical stock quotes in case the default API does not report stocks in a given geography (For instance to access JSE stock exchange).
  • Adds the option to lock a book entry, preventing it from being erased or tampered with when the verification level is set to “Bank Statement”.
  • Adds the options to remove iAd Banners through an in-App purchase.
  • Prevents interstitial adds to popup when switching tabs within the opened document.
  • Adds the option to select the default year to open (between the latest one and the current year).

To learn more about BudgetInMind for iPad, simply follow this link.

LinkedEntry_En

How to create a linked entry

When you want to split a receipt, you can used a Linked entry. This way, your bank account is associated with the supplier for the total amount, and the reconciliation with your bank statement becomes greatly simplified since the account and the amount will match those on your bank statement.

Let’s suppose that you spent $100 at HEB and paid by check, and want to split your spending in 3 buckets, 60$ in groceries, $25 in DVDs and 15$ in various clothing:

  • First, make sure all the accounts you need exists. If one is missing (typically the supplier in case of a new one), go the the Structure tab and created it before entering the transaction.
  • Create a linked entry where the ressource account is your bank account Bank:Chase Checking and the tier account is your supplier account Supplier:HEB. Enter the amount in total.
  • Then, create one line per split entry, with the employ account being the destination account for the spending (for instance Purchases:Food).
  • BudgetInMind will compute the remaining amount to ensure you do not forget some pennies in the split.
  • Before pressing ‘Insert’, we recommend that you change the foreground text color to quickly pinpoint the entry in your book.

Once done, press “Insert” to add the book entry. You can then switch to the Budget and Account tabs to understand the effect of the split.