How to use AirDrop on your iPad?

When you want to transfer a file from your iPad to a Mac, you can simply use the embedded AirDrop feature to seamlessly move any of your file to any Mac for which you have AirDrop rights.

This requires both the iPad to run iOS 8 and the Mac to run OS X 10.10 (Yosemite).

Simply follow these steps:

  • First, ensure that you enabled AirDrop; if not, activate it (you need both WiFi and Bluetooth)
  • Open BudgetInMind on your iPad. If a file is opened, simply close it to return to the File Manager
  • Press the Share button in the toolbar and press “Send a Copy”
  • Select the file you wish to transfer
  • If you want to transfer a file by Email, press the Zipped File image, otherwise, select the Standard format
  • Wait for AirDrop to find your Computer then press the icon of the destination computer
  • That’s it. The file is uploaded to your Mac where you’ll have a choice to directly open it or it will be saved in your Download folder for later use

To Send a file from your Mac to your iPad, simply do the reverse. You can directly drop any BudgetInMind file in your iPad icon on your AirDrop folder, or use the share Button embedded within BudgetInMind for Mac.
An alert box will popup asking you to accept the incoming file.

If the file already exists, we will rename it to prevent erasing your existing files.

Managing Stock Split

Managing Stock Split

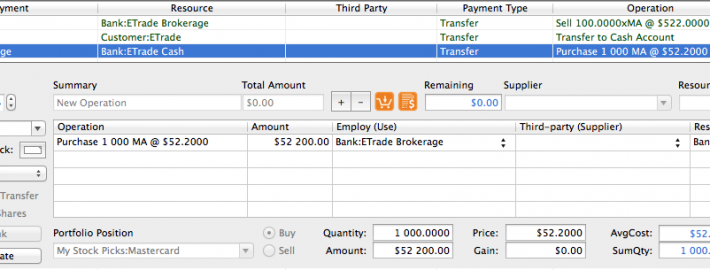
With the recent Apple 7:1 stock split, you may wonder how you can manage this event within BudgetInMind.

This operation is in fact straightforward: If you hold V stock with an average cost of c and with a current market value of p, then a N:1 stock split will simply transforms these variables into V.N, c/N and p/N.

Yahoo finance API stores historical quotes on their servers, so even if the stock splits in a given day, the market closing price of the previous day remains the value before the split.

To take this into account in BudgetInMind and continue using the automatic download features, we simply need to mimic what occurred in real life:

For every 1 stock you hold, you will receive N news stocks

This translates into:

  • For each position with the given stock, sell all your quantities at pre-split cost.
  • For each position with the given stock, buy N times your pre-split quantity at 1/Nth of the cost.

The following files contain database examples before and after the stock split:

FilenameLanguageDownload
Pre_StockSplit.dbim.zipEnglish
Post_StockSplit.dbim.zipEnglish
LinkedEntry_En

How to create a linked entry

When you want to split a receipt, you can used a Linked entry. This way, your bank account is associated with the supplier for the total amount, and the reconciliation with your bank statement becomes greatly simplified since the account and the amount will match those on your bank statement.

Let’s suppose that you spent $100 at HEB and paid by check, and want to split your spending in 3 buckets, 60$ in groceries, $25 in DVDs and 15$ in various clothing:

  • First, make sure all the accounts you need exists. If one is missing (typically the supplier in case of a new one), go the the Structure tab and created it before entering the transaction.
  • Create a linked entry where the ressource account is your bank account Bank:Chase Checking and the tier account is your supplier account Supplier:HEB. Enter the amount in total.
  • Then, create one line per split entry, with the employ account being the destination account for the spending (for instance Purchases:Food).
  • BudgetInMind will compute the remaining amount to ensure you do not forget some pennies in the split.
  • Before pressing ‘Insert’, we recommend that you change the foreground text color to quickly pinpoint the entry in your book.

Once done, press “Insert” to add the book entry. You can then switch to the Budget and Account tabs to understand the effect of the split.

InitialBalance_En

How to set the initial balance of my bank account

It is important to understand that bank accounts are part of your financial assets. It is an asset that you own. As in double-entry accounting, at least 2 accounts are modified per transaction, you must ask youself what is the dual account of your bank account in this instance.

It’s very simple. It is your Capital account. In fact, your bank accounts belong to you, and the account that represents you as a person is the Capital account.

Therefore, to set the initial balance of a bank account, you just need to enter a simple book entry where the employ is your bank account and the resource is your capital account. In other words, the wealth you saved over time is placed here in liquidity on your bank account.

Let’s suppose that you have a Checking account at Chase with an initial balance of $4,000. You then need to:

  •  Set the general parameters (date, etc..)
  • Set the amount to $4,000
  • Select Bank:Chase Checking as your employ account
  • Select Capital Funds:Capital as your resource account
  • You can also add a comment if you wish such as “Initial Balance”

If you want to set the initial balance of a credit card bank account, just do the same, but with a negative number that represents how much you owe your bank. Or leave a positive amount and switch the employ and resource accounts. It’s has you wish, both options are valid.

Now, if you go to the Budget tab and select the Balance Sheet view, you will clearly understand the operation. Likewise, you can check the initial balance of these 2 accounts in the Account tab.