When you have different users, the leveling view can quickly calculate for you the amount to transfer from one user to the other according to each user's forecast and actual expenses. All the account transactions are created for you and you will only have 1 money transfer to perform from one user to the other by simply going on your bank web site to execute such transfer.
-
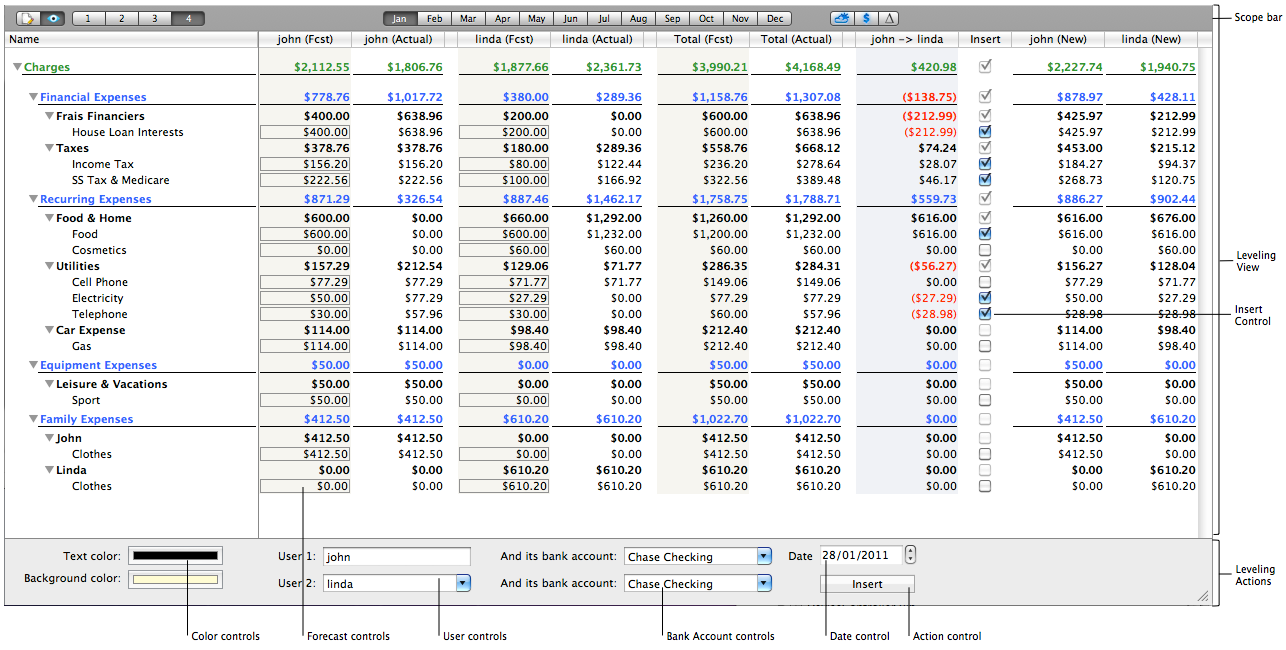
Scope bar: The scope bar allows you to alter what you see on the view. Refer to Scope Bar for additional information.
Note: Remember to select first the month and the viewable columns since any changes afterwards will reset the view below including the checkboxes enabled by default and the row visibility reset to the selected level.
-
Leveling View: Main view that shows each user's expenses account balance and forecast for the given month in order to calculate equalization amounts. The resulting account balances are shown on the right side for each user. If you want to change the equalization amount, you can alter the forecasts and see the resulting change to the amount.
-
Insert Control: Click each non zero line 'Insert' checkbox to allow or prevent the insertion for this line of expense. This is useful if, for instance, you do not want to equalize each person's car gas expenses.
Tip: If you hide a row, its children will not be inserted even if the row is checked for insertion.
-
Leveling Actions: Configuration panel to create the book entries. You must enter the user you want to level with, as well as each user's bank account. Then select a date for insertion. It must be within the selected leveling month selected first on the Scope bar. You can also alter the default text and background colors.
-
Color controls: Click on each color picker to select the text and background colors. These colors will be used when creating the book entries (one for each user).
-
Forecast control: You can alter the forecast for each line and each user here, as in the Budget view, without going back to the Budget view.
-
User controls: Click on the control to set the user to level with. The first user is the active user.
-
Bank account controls: Click on each control to select which bank account will be debited or credited for each user.
-
Date control: Click on this control to select the date of insertion. The date must be within the selected month.
-
Action control: Click on this button to insert all checked line in each user's book.
Tip: If you are not happy with the result of a leveling, just erase the book entries for each user and start again.